These DIY whiteboards are ridiculously easy. So easy that it makes me think “Doh! Why didn’t I think of that sooner?!” You can make two or three or even more of them in less than five minutes. And best of all, it couldn’t possibly be any cheaper! I bought my frames from the dollar store, and I already had the fancy paper at home, so each whiteboard cost less than $5 when you include the dry erase markers.
Five minutes and five dollars. That’s my kind of project!
We go through a lot of paper in our house. I feel responsible for the death of a lot of trees. Construction paper. Printer paper. Colouring books. Sketch pads. Notes beside the phone. We have all of it. And once the kids have made their mark, into the recycling it goes. (Using my stealthy hiding skills of course. Once they see it in the recycling bin, it’s ten times harder to convince them to let me throw it out.).
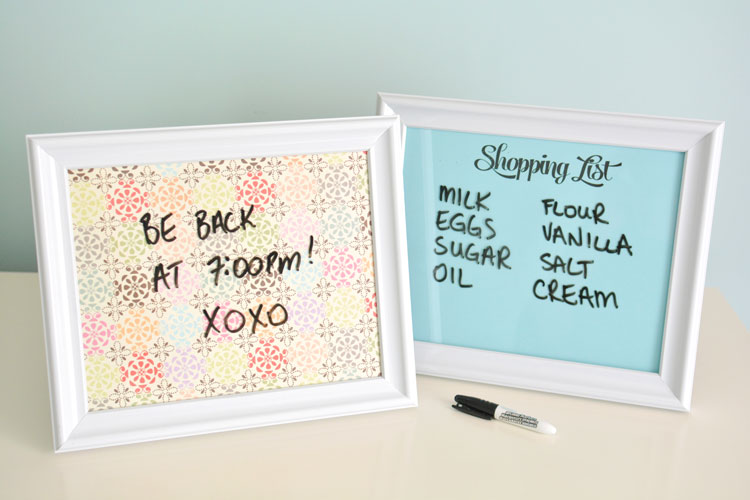
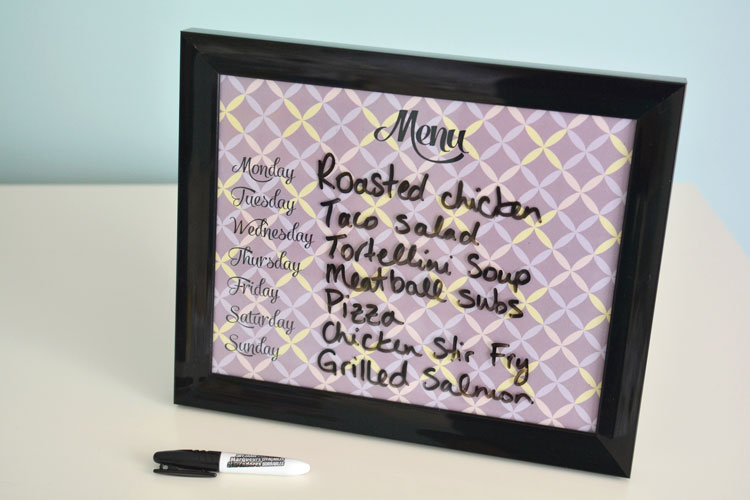
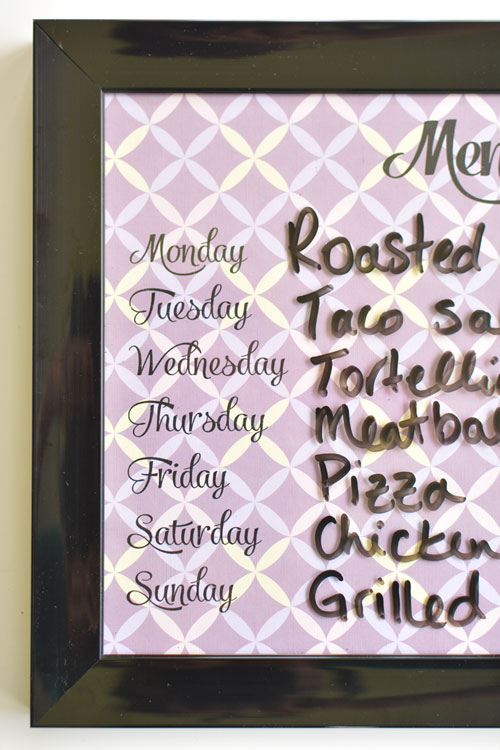
I love that you can use these DIY whiteboards for little notes. Like when you need to let your family know you’ve run to the store and you’ll be right back. Or when you have to write down a phone number or the date of an appointment. Or my personal favourite, you can use it as a menu planning board (I’m including the free printable template for that one down below!).
And let me just say that my kids have been LOVING these dry erase boards. My six year old and my four year old have been drawing pictures on them like crazy. And as soon as they’re done, they ask me to take a picture with my phone so we can save it for prosperity. And then something magical happens – They’re able to let go, and they wipe off their drawing, knowing that I’ve saved it on my phone. It’s like a small miracle going on in our house!
I wish I could take all the credit for this brilliant idea, but I got the idea from Make and Takes. So simple, but so elegant and useful!
I couldn’t decide what frame colours I wanted so I ended up buying two black frames and two white frames. Both of my daughters have claimed one whiteboard each, I have one in the kitchen, and I think I’m going to use the last one on my desk for jotting down my to-do list. It’s such a simple idea, but somehow it really helps me feel more organized!
Easy DIY Whiteboard
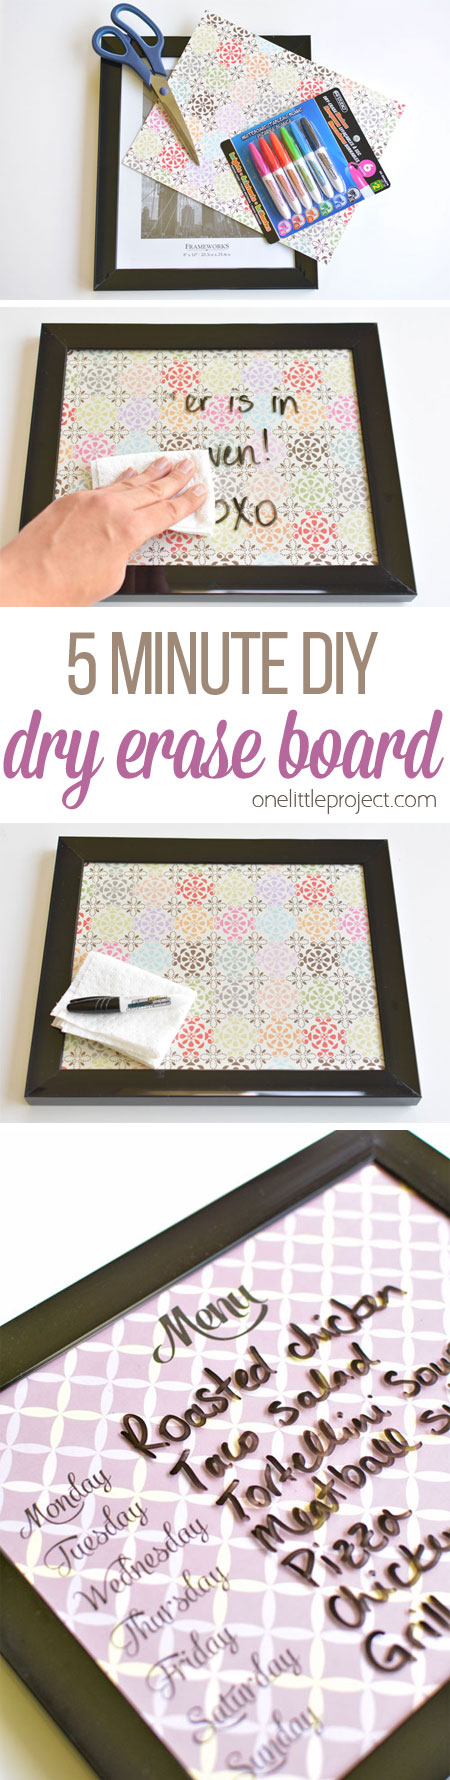
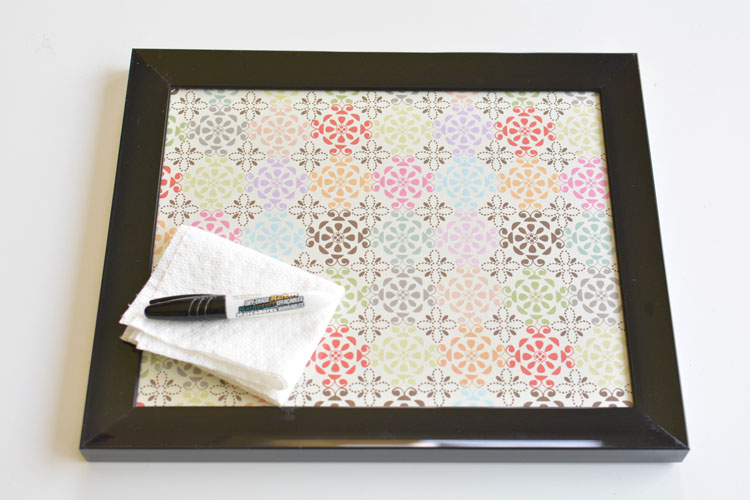
These are SO SIMPLE. This is all you need:
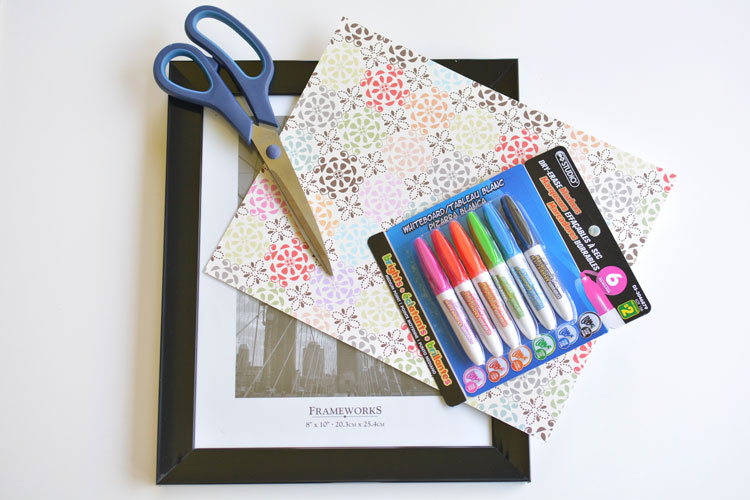
- One frame from the dollar store (Mine were for 8″ x 10″ photos)
- One piece of fancy scrapbook paper
- Dry erase markers
And if you want, you can download my free printable templates. Print them on regular letter sized paper and trim them to 8″ x 10″ using the lines on the template:
Weekly Menu Printable Template
Shopping List Printable Template
The frames I bought had the stand at the back so you can stand them up on the counter. Or you might want to hang your whiteboard on the wall? Just double check that your frame has the right hardware for how you plan to use it. The ones I bought would be kind of wobbly if I hung them on the wall.
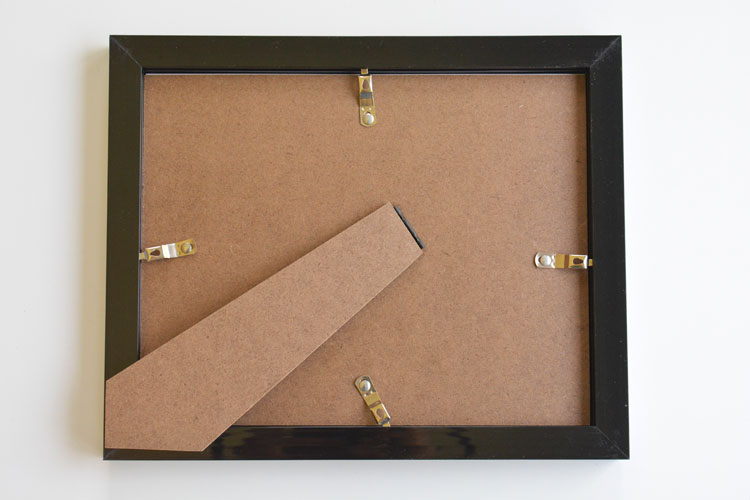
Remove the back, add in your fancy scrapbooking paper and you’re done!
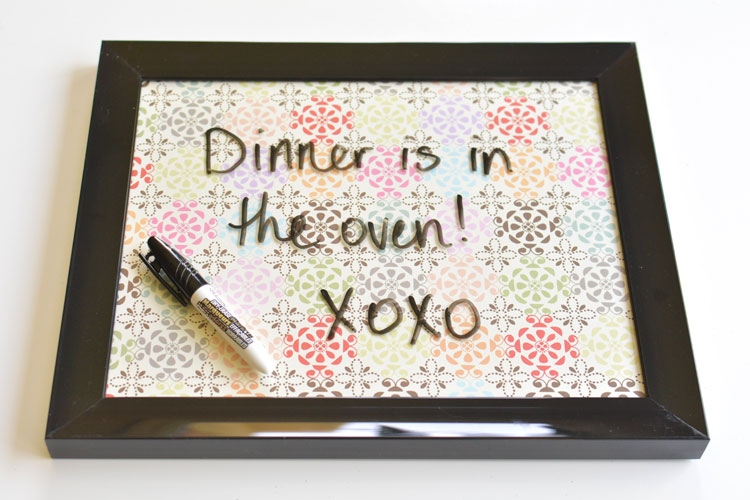
The dry erase markers wipe right off the glass in the frame!
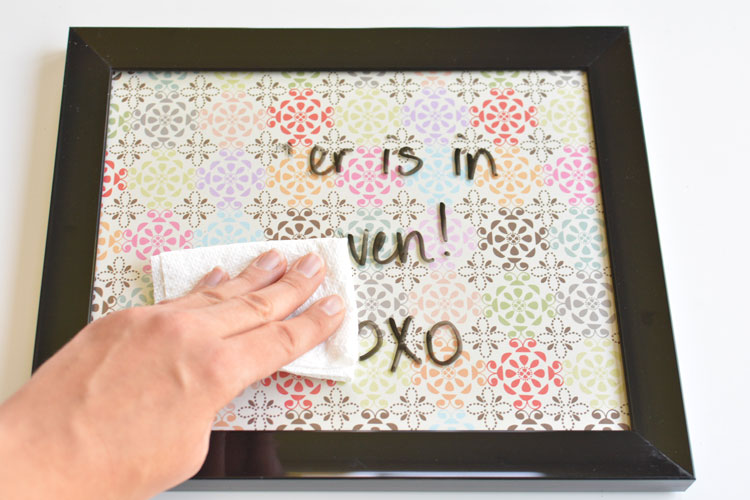
So you can use it over and over again!
You can keep it blank if you’ve got a heavy pattern on your paper. Or you can print out the Shopping List and To-Do List templates on plain paper. Totally up to you!

You know those moments when you think of something you need from the store and you need to write it down, but you don’t have anywhere to put it? Use the Shopping List template, and just take a picture of it before you go to the store. So easy!
Weekly Menu Printable Template
Shopping List Printable Template
These would be fantastic for your desk or office! It’s a great place to write down those little things that you just don’t want to forget!
I love that you can choose your favourite paper designs. How pretty would two of them be side by side with coordinating patterns and colours?!
And when you get tired of it, just change the paper and you’ll have a whole new look!
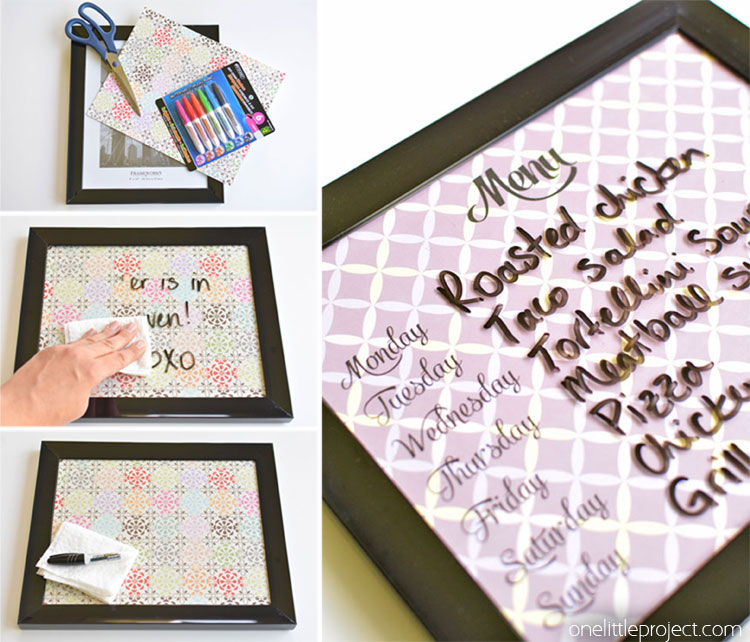
I can’t believe how simple it is to make your own DIY whiteboard! Use a dollar store frame with your favourite scrap booking paper and you’re done! You can use our free printable templates to turn it into a Shopping List, a To-Do List or a Menu Planning board. Such a pretty and EASY little project! And it’s such an easy way to cut down on the amount of paper your family uses!


Leave a Reply