Sunday, May 4, 2025

So Kind for The Flower Challenge

Hello friends!  It's time for May flowers at The Flower Challenge!  This month we'd like you to add spots or stripes.

I went with spots this time, using an older Tim Holtz stencil that hadn't seen the light of day for some time.


Truth be known, the stamp set hadn't been used for over a year either.  I believe those flowers are camellia japonica, at least that was the photo they resembled in my search.  Anyway, I decided to use all three floral images from the set, along with one of the sentiments.

I colored them with Olo markers then die cut them with the matching dies.  For the background I moved the stencil around the panel to get  uneven coverage, then ink blended around the outside before splattering with gold metallic paint.  When that all dried the layered arch die cut was adhered along with the flowers framing the sentiment.  No gems, I thought the splatter was sufficient.


Well, we finally have some truly warmer weather and I think it's going to stick around.  How about you?  As the weather gets better, I hope you'll still find time to join us this month!  The challenge will remain open until Sunday, May 25th. But, before you head off, please be sure to visit the blog where my oh-so-talented teammates have some gorgeous cards to inspire you.

Take care and thanks for stopping by!

Stef

  • SSS/Memory Box So Kind Stamps and Dies (Stamptember 2023)
  • Tim Holtz Bubble Stencil
  • SSS Nested Domed Arches Frame
  • SSS Seafoam ink
  • Gansi Tambi Starry Colors Gold Metallic paint
  • Olos - RV0.6, 0.4, 0.2, 0.1, G1.8, 1.7, 1.5, 1.4
  • Copics - E37, 33

Forest Sunset for The Paper Players

Hello friends and happy May!  It's time for a new challenge at The Paper Players.  This week the amazing Joanne is hosting our theme challenge and she's chosen a fun one!

For this challenge, we need to pair something old with our newest crafty item.  I recently, finally went all in on the postage trend and bought some of Waffle Flowers Postage Collage dies and their latest stamps.  I paired those new items with one of my older and favorite sentiment sets, also from Waffle Flower.  Let's take a look!


I was quite enamored with these beautifully designed silhouette stamps and had fun deciding what each little vignette would contain.  I started by using the stencil that goes with the product line and used Distress inks for the sunset sky.  I then added a bit of white paint splatter to create stars in the sky.

When that dried, I stamped the various scenes, then layered on the Postage Collage Block die cut from black cardstock, which separates each scene.  The white heat embossed sentiment was added before adhering the entire thing to a black card base.  


Since I had everything out, I made a second card but substituted some brighter inks for creating the sky.  I like both cards and don't know if I have a preference.  How about you?


Won't you come join us this week and share what old and new products you paired? The challenge is open until Friday, May 9th at 3pm EST.  In the meantime, don't miss all the inspiration by my lovely teammates over on the blog!

Take care and thanks for visiting!

Stef

PS Come back later this morning for my new Flower Challenge DT card.

  • Waffle Flower Postage Collage die, Blocks Die, Stencil and Forest Sunset Stamps
  • Waffle Flowr Elegant Sentiments stamps and dies
  • Card #1 - Scattered Straw, Worn Lipstick, Picked Raspberry, Faded Jeans and Seedless Preserves Distress inks
  • Card #2 - SSS Lemonade, Sweets, Galaxy and Amethyst inks
  • Spellbinders Splatter White paint
 

Thursday, May 1, 2025

Sending Sunshine for Color Hues

Hello friends!  Here we are at the first of May and it's time for a new challenge at Color Hues.  The amazing Marcia is our host this week and has chosen a lovely color pairing of blue and yellow.

When I saw these colors, I had a vision of what I wanted to create and set about doing it.  See what you think.


I've had the Spellbinders Build-A-Wreath die set for quite a while (thanks to my friend and crafty enabler, Nancy!) and used just one of the flower dies to create these cute sunflowers.  They were cut twice with a lighter and a darker shade of yellow, layered up and a brown center added.

For the background, the Altenew Trellis die was cut from white to layer on the blue base layer.  The sentiment was cut twice from white and once from the lighter shade of yellow, layered up and added to the white base.  It was centered on the card then the flowers were added on each side.  The sentiment and flower centers were brushed with a glimmer pen and the final step was to randomly add a few clear sequins.


What are you inspired to create with these colors?  To see what the team did, head over to the challenge, where my talented cohorts and our lovely guest Nance have some fabulous cards to share.  The challenge will remain open until 9am EDT on Wednesday, May 14th.  Won't you please come join us?

Take care!

Stef

  • Spellbinders Build-A-Wreath dies
  • Altenew Scripty Sentiments dies
  • Altenew Garden Trellis Cover die

Sunday, April 27, 2025

Warm and Merry Christmas for the Paper Players

Hello friends!  For the final Sunday of the month, the Paper Players brings you a sketch challenge!  This time the lovely Claire has created a highly versatile sketch.


I decided to add to my holiday card stash using this sketch and a cute die set that I bought and never used last year.  Time to change that!


I started by putting together the Old Fashioned Rocking Horse die from Honey Bee Stamps.  It has multiple little layers, but my handy reverse tweezers helped me when attaching them.  The rocking horse was added to the white scallop circle, which was then matted on a gold circle before adding to the card.  Here's a close up of the rocking horse:


I love all the embossed texture and the well though-out details.  The patterned papers are also from Honey Bee and the sentiment is from a retired packet of pre-foiled holiday sentiments.  The card ended up being A7 because it was more proportional to the rocking horse and circles.


Thanks so much for visiting!  I hope you'll join us this week and show what you're inspired to make with this great sketch.  In the meantime, for more ideas, head over to the challenge where my talented teammates have some great examples to share!  The challenge remains open until Friday, May 2nd at 3pm EDT.  

Take care!

Stef

  • HBS Old Fashioned Rocking Horse die set
  • Hero Arts Nested Circle and Scallop Circle dies
  • Spellbinders A7 Matting die
  • HBS Gingerbread Village patterned paper

Sunday, April 20, 2025

Bunny Kisses for the Paper Players

Hello friends and Happy Easter!  It's time for a new challenge at the Paper Players.  The amazing Elizabeth is hosting CAS week, and she has chosen the prompt Bunny.


I had some fun with this one, I hope it'll make you smile!


I decided to use the Bounding Bunnies from SSS and actually have them bound across the card!  The bunnies have two layers, one is the white front and the other goes behind to add color to the ear interior.  It also has a spot for the tail, where I chose to use little pompoms from my stash.

The sentiments are from the SSS Happy Eggs set and after die cutting, were lined up in the middle of the card.  Well, except the Bunny Kisses was added a little too close to the ampersand, so there's a bit more room at the bottom than the top.  But hey, it's handmade not store bought, right?

After adhering the bunnies and "tails", I used a black glaze pen to color in the eyes and add a bitty nose, then used a light pink Copic marker to add just a smidge of pink to give them rosy cheeks.  I thought about adding some gems, but I wanted to leave more "white space" since I knew my card was already pushing the boundaries for CAS lol! 


I hope you'll join us this week, wherever that bunny trail takes you in your creative journey!  The design team has a variety of cards to inspire you, so be sure to visit the blog.  You'll have until Friday, April 25th at 3pm EDT to join in.

Thanks for visiting and have a great week!

Stef

  • SSS Happy Eggs stamps and dies
  • SSS Bounding Bunnies dies
  • Honey Bee Stamps Scallop Rectangle die
  • Pompoms from my stash

Wednesday, April 16, 2025

Ears to You for Color Hues

Hello friends!  Today I'm sharing my card for the latest challenge at Color Hues!  The delightful and talented Nancy will be our host for the next two weeks and she has chosen a beautiful color combination.

I'm also popping in at the last minute to join the Word challenge at Just Us Girls, using the word you.


I love this soft color pairing and decided to make a cute and simple Easter card.


I adore that big bunny and used it a couple of years ago to create shaped Easter cards for the grands, but this time I wanted to use her on a card front.  Because of her size, the card ended up being A7.

Starting with the background, I randomly ink blended Shaded Lilac and Salvaged Patina over a panel of mixed media paper.  When the ink dried the panel was embossed with tiny polka dots and then trimmed down. 

The bunny, flowers and leaves were die cut in white, then ink blended with the same colors.  The bunny was adhered to the blended background, added to the card front and decorate with one flower and the leafy branches.  The sentiment was stamped, fussy cut and added to the card with thin foam squares.  I decided it still looked a little bare, so the remaining flower and two leaves were adhered in the corner.  The last touch was to add Glossy accent to the bunny's gray eye and Stardust Stickles to the white flower centers.  


For more inspiration be sure to visit the challenge blog and check out the fabulous variety of cards created by my talented teammates and our Guest Designer Caroline!  I hope you'll join us for this challenge, it will remain open until Tuesday, April 29th at 3pm EDT.

Thanks for visiting and take care!

Stef

  • Ellen Hutson Essentials by Ellen Sew Cute Bunny dies and Ears to You stamp set
  • Spellbinders Tiny Dots embossing folder
  • Salvage Patina and Shaded Lilac Distress Inks
  • Simon Says Stamp Earl dye ink

Tuesday, April 15, 2025

Hello for The Flower Challenge

Hello friends!  I'm back with my reminder post for The Flower Challenge.  This month the theme is to use spring colors.

At the first of the month I used purple and green here so this time I went with more peachy/orange colors.  


I started by coloring the flowers with Copic markers and the leaves with Olo markers.  I was trying to achieve a peachy color for the flowers but in the end it appears to lean more toward orange, and I was fine with that.  After die cutting, I used a black glaze pen to color in the stamen.

For the background I used the SSS Whirl Diamond Plate in white on a piece of Spellbinders Bellini cardstock, which I though complimented the color of the flowers without competing with it.  I placed the floral image up a little higher on the panel than I wanted, so I found a large die cut hello that helped balance things out.  Black enamel dots finished things off.


Can you believe it's mid-April already?  Time flies, that's for sure, but if you haven't joined us yet this month, or you have another floral with spring colors, there's still time to share.  The challenge will be open until Friday, April 25th. Please take a moment to visit the challenge blog, my amazing teammates have some more inspiration for you.  

Thanks for visiting and take care!

Stef

PS - come on back tomorrow when I'll be sharing my DT card for our new Color Hues challenge!

  • Simon Says Stamp/Alex Syberia Close at Heart stamp and die (Stamptember 2024)
  • SSS Whirl Diamond Plate
  • Altenew Timeless Sentiment dies
  • Altenew Essential Black Enamel Dots
  • Sakura Black Glaze pen
  • Copics - YR68, 02, 00
  • Olos - YG 1.6, 1.4, 1.2

Sunday, April 13, 2025

Butterfly Blossoms for the Paper Players

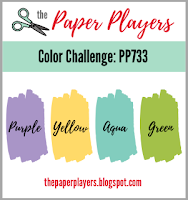
Hello friends!  It's color week over at the Paper Players and I'm hosting.  I chose some Spring-like colors.

I'm also joining in over at the Time Out Challenge.  This time we are to Pick Two, so I'm choosing floral and stencil.


As you could tell from the blog title, I chose to use flowers. I debated about making an Easter card because I think the colors would work equally well for that occasion, but the flowers won out.


The stamp set has three dainty flower stamps and four butterflies, so lots of variety.  I used the coordinating stencils to color the images and the dies to cut them out as well as the sentiment.

I lightly ink blended Salvage Patina Distress ink on a white panel the cut it down with a postage edge rectangle die.  The shorter flowers were adhered directly to the panel except for the largest flower in the group to which I added thin foam squares.  The remaining floral image along with the sentiment and large butterfly were layered on two additional die cuts before adding to the panel.  The right wing of the wee little butterfly was glued down and a small piece of foam tape added a little dimension to the left wing.  It's not visible in the photos but I used an aqua shimmer pen to add glitter to all the images, then finished things off using a white gel pen for the flower stamen.


What do these colors inspire you to create?  I hope you'll show us this week, we'd love to see what you come up with.  Do take a moment to pop over to the PP blog as my teammates have some lovely cards to provide further inspiration.  The challenge remains open until Friday, April 18th at 3pm EDT.  

Thanks for visiting and take care!

Stef

  • Simon Says Stamp Butterfly Blossoms stamps, dies and stencils
  • SSS Postage Edge die
  • Altenew Lemon Ice, Honeydew Glow and Lemonade Stand inks
  • SSS Sprout, Fairway, Field, Lilac, Orchid, Amethyst and Mocha inks